Last Updated: November 11, 2026
Quick Summary
Embroidery proof approval typically takes 1-2 business days for you to review and sign off, after the design team spends 1-3 business days digitizing and preparing the proof. Production only starts once you approve, so a delayed approval pushes your delivery date back day for day.
- Production begins when you approve the embroidery proof, not when you place or pay for the order.
- Digitizing and proof preparation usually take 1-3 business days before the proof reaches you.
- Review the proof full size on a desktop and check placement, size, thread colors, spelling, and garment details.
- Send all revision feedback in one consolidated message with changes stated in inches and Pantone numbers.
- Shops count turnaround in business days, so a Friday proof often means a Monday review.
Table of Contents
- What an Embroidery Proof Shows Before Production
- Why Proof Approval Decides Your Production Start Date
- The Full Embroidery Proof Approval Timeline, Step by Step
- How to Approve an Embroidery Proof Without Missing Details
- What the Embroidery Order Production Timeline Looks Like After Approval
- What Happens When a Proof Goes Unapproved
- Frequently Asked Questions
What an Embroidery Proof Shows Before Production
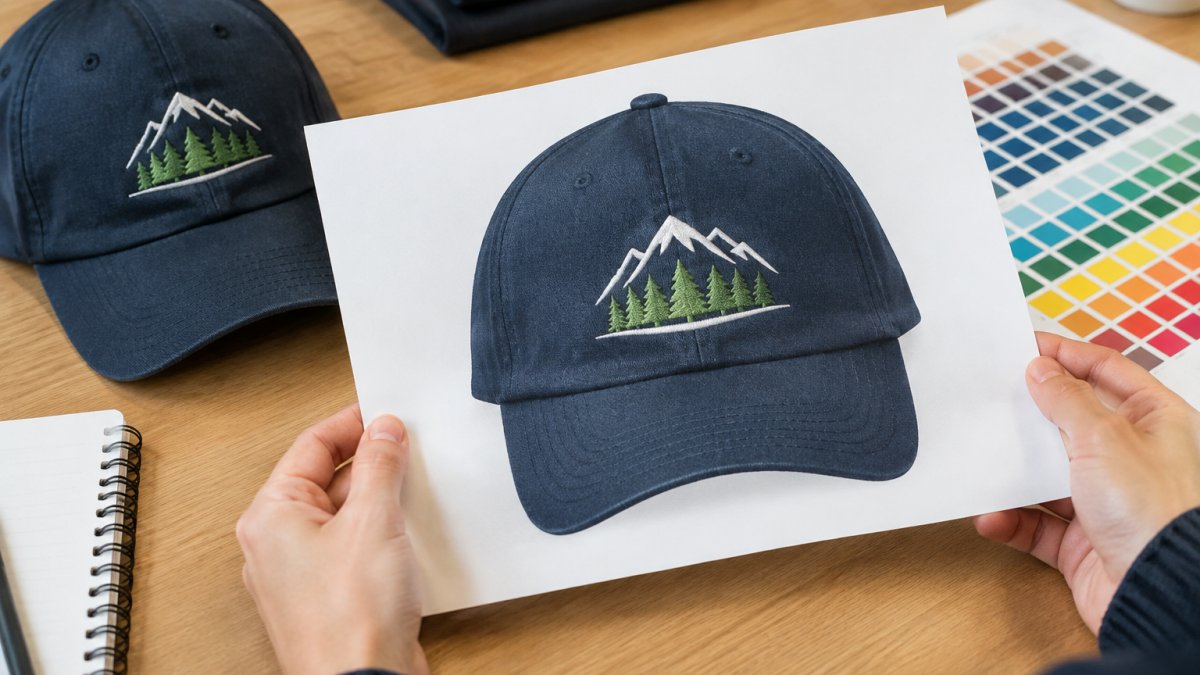
An embroidery proof is a digital preview of your finished logo on the actual garment, and it is the last checkpoint before stitching begins.
Teams that treat the proof as a quick formality often lose the most time. Teams that review it carefully can start production sooner.
A proof shows several things at once:
- Logo size and exact placement on the chest, sleeve, or cap
- Thread colors matched to your brand or school palette
- Stitch count and density, which affect how the logo feels
- Garment style, color, and size breakdown
- Any text, numbers, or names and how they line up
A proof cannot show every detail, such as thread sheen under gym lighting or how a stitch feels on a lightweight jersey. If you are weighing embroidery against another decoration method, our comparison of screen printing vs embroidery covers where each one wins.
Why Proof Approval Decides Your Production Start Date
Production does not begin when you pay. It begins when you approve. That single rule explains most deadline misses we hear about.
The approval process is a handoff. Your design team finishes digitizing, sends the proof, and then waits. Nothing moves to the machines until your sign-off lands.
Your response time is the one you control. A quick approval helps keep production on schedule, while a delayed approval can push the order back.
The Full Embroidery Proof Approval Timeline, Step by Step
Here is the complete path from order to delivery. Timings vary by provider and order size, so treat these as general planning guides rather than promises.
| Step | What Happens | Who Acts | Typical Window |
|---|---|---|---|
| 1. Order placement | Files, sizes, and garment details submitted | You | Day 0 |
| 2. Digitizing and proof prep | Artwork converted to stitch file, mockup built | Design team | 1-3 business days |
| 3. Proof review and sign-off | You check placement, colors, spelling | You | 1-2 business days |
| 4. Production and delivery | Stitching, finishing, shipping | Shop | 5-15 business days |
Step 1: Order Placement and File Submission
Everything downstream depends on what you send in this step. Clear files mean a clean proof. Rough files mean back-and-forth before digitizing even starts.
Send vector artwork when you have it. Our guide on how to prepare artwork for custom uniforms walks through file types and resolution so your first proof is your last.
Include the full order details up front: garment styles, size runs, player names and numbers, and deadline. Missing sizes are one of the most common causes of a stalled order.
Step 2: Digitizing and Proof Preparation
Digitizing is the process of converting your logo into a stitch file a machine can read. It is not a copy-paste job.
This is where the embroidery proof is born. The design team builds a digital mockup showing your logo on the actual garment in the actual colors. Complex logos with fine detail or small text take longer. Simple two-color marks move fast.
Ask your provider for their digitizing window before you order, not after.
Step 3: Proof Review and Sign-Off
This step belongs to you, and it is the one that most often slips. Review the proof against your original order line by line. Check spelling of every name, confirm placement height, and verify thread colors against your brand guide.
Reply with a clear approval or a single consolidated list of changes. Scattered emails across three days stretch the revision cycle. One message with all feedback gets you a corrected proof faster.
Step 4: Production and Delivery
Once you approve, the order enters the production queue. Stitching, finishing, quality checks, and shipping follow.
Ask for the production window in writing at order placement. Combined with your review time, it helps you set a realistic delivery date.
How to Approve an Embroidery Proof Without Missing Details
Approving an embroidery proof means confirming five things in writing: logo placement, size, thread colors, spelling, and garment details. Do that, and you avoid nearly every reprint we see. But the difference between a fast approval and a three-round revision cycle is not how carefully you look, it is how specifically you write your feedback.
A common mistake is approving from a phone screen while walking into practice. Small text looks fine at thumbnail size and turns to mush at stitch level. Open the proof full size on a desktop, and compare it side by side with your original order confirmation.
Run this checklist before you reply:
- Logo placement matches the order (left chest, center chest, sleeve)
- Logo size looks right relative to the garment
- Thread colors match your brand or school colors
- Every player name and number is spelled correctly
- Garment style, color, and size run are correct
- Deadline still works with the quoted production window
How to Write Revision Feedback That Gets It Right in One Pass
Vague feedback is the most common cause of a second proof. “Make the logo bigger” forces the digitizer to guess. “Increase chest logo width by one inch and move it half an inch higher” gets it done in one pass. Use this format for every change request:
- Size: State the change in inches, not adjectives. “Reduce left-chest logo from 3.5 inches to 3 inches wide.”
- Placement: Reference a fixed point. “Center the logo 7 inches below the shoulder seam, 3 inches from the placket.”
- Thread colors: Give a Pantone number or a physical swatch reference. “Match the navy to Pantone 289 C, not the current 282.”
- Design changes: Describe the element and the action. “Remove the outer ring, keep the mascot, and enlarge the school name by 20 percent.”
- Text and numbers: Spell out the correction. “Player 14 should read ‘O’Connell,’ not ‘OConnel.'”
Consolidate every change into one message. Scattered emails across three days stretch the revision cycle, because each new email may restart the digitizer’s review.
Watch out: bundling late changes after approval can restart the whole cycle.
If the proof shows digitizing details you want to understand before signing off, our guide to professional logo embroidery services explains file requirements and what the digitizer decides for you.
(/fast-turnaround-custom-apparel-printing-guide/) explains how rush options change the math.
What the Embroidery Order Production Timeline Looks Like After Approval
Production time after approval depends on quantity, season, and order details, so ask your provider for the production window in writing.
Here is how the post-approval window typically breaks down:
- File lock and setup: under one business day
- Stitching: the bulk of the window
- Finishing and folding: one to two business days
- Shipping: varies by distance and method
Busy seasons can lengthen production, so ordering early gives you more room. Order early, approve fast, and you stay ahead of the crunch. Our bulk embroidery turnaround timeline breaks the full schedule down step by step.
What Happens When a Proof Goes Unapproved
An unapproved proof stalls the order. Nothing gets stitched, and the deadline slides day for day until you respond. This is the single most avoidable delay in custom apparel. But what actually happens, and when, depends on how your shop counts business days and how it handles its production queue.
How Business Days and Cutoffs Affect Your Approval Window
Most embroidery shops count turnaround in business days, not calendar days. Weekends and federal holidays do not count.
Ask your provider two questions at order placement: When does the clock start, at proof send or at proof open? And what is the daily cutoff time for a response to count that day? A proof sent at 4:55 p.m. may not be logged until the next business morning.
What Shops Actually Do When You Do Not Respond
A late approval can delay production and may affect a promised delivery date, so confirm any reminder and slot-holding policy with your provider before you order.
If your order is tied to a fixed event date, confirm the hold and delivery policy in writing before you order.
Can an Unapproved Order Be Canceled?
Cancellation terms vary by provider, so ask for them at order placement, not after a deadline slips.
The fix is simple. Assign one person to own proof approval, give them a backup, and set a rule: proofs get reviewed within one business day of arrival. If your roster changes mid-season, tell your provider at order placement so reorders can be planned rather than rushed.
Frequently Asked Questions
How long does it take to receive an embroidery proof?
Proof timing depends on artwork quality and order details. The exact window depends on artwork quality, how many garments and placements are involved, and where your order lands in the queue. Ask for the proof turnaround window in writing when you place the order so you can plan your season schedule around it.
What should I check before approving an embroidery proof?
Check five things: spelling of team or business names, thread colors against your brand standards, logo size and placement on each garment, the stitch count and detail level, and the garment style and color listed. Zoom in on small text, since stitching simplifies fine detail. Confirm the quantity and sizes match your roster. If anything is off, mark it on the proof and send specific instructions rather than a general note like make it look better.
How many revisions are usually included with an embroidery proof?
Ask your provider about the number of revisions included and any fees for additional rounds before ordering. Revision speed matters as much as quantity: simple changes can often be handled faster than larger redesigns. Send all your changes in one message to keep the embroidery proof revision turnaround time short.
What happens if I do not approve the proof by the deadline?
Production does not start until you sign off, so a missed deadline pushes your delivery date back by at least the days lost. Some shops hold the order and send reminders; others move it to the back of the queue. If your season opener is close, tell your provider your drop-dead date up front.