Table of Contents
- What Professional Logo Embroidery Services Include
- Logo Digitization for Embroidery: Turning Artwork Into Stitches
- Custom Embroidery File Requirements: What to Send
- Choosing Garments and Logo Placement
- The Cost of Custom Logo Embroidery: What Drives Pricing
- Minimums, Turnaround Times, and Reorders
- Caring for Embroidered Apparel So Logos Last
- Frequently Asked Questions
Last Updated: September 11, 2026
What Professional Logo Embroidery Services Include
Professional logo embroidery services turn a flat digital logo into raised, stitched branding on hats, polos, jackets, and bags. At Piercy Sports and Apparel, we handle the full chain, digitizing artwork, sourcing garments, stitching the logo, and shipping finished pieces, under one roof.
That matters more than most buyers realize. Embroidery is not printing with thread: the machine reads a stitch file, not a JPEG, and every curve becomes a sequence of needle penetrations. Get that translation wrong and you get a puckered, distorted logo no re-pressing will fix.
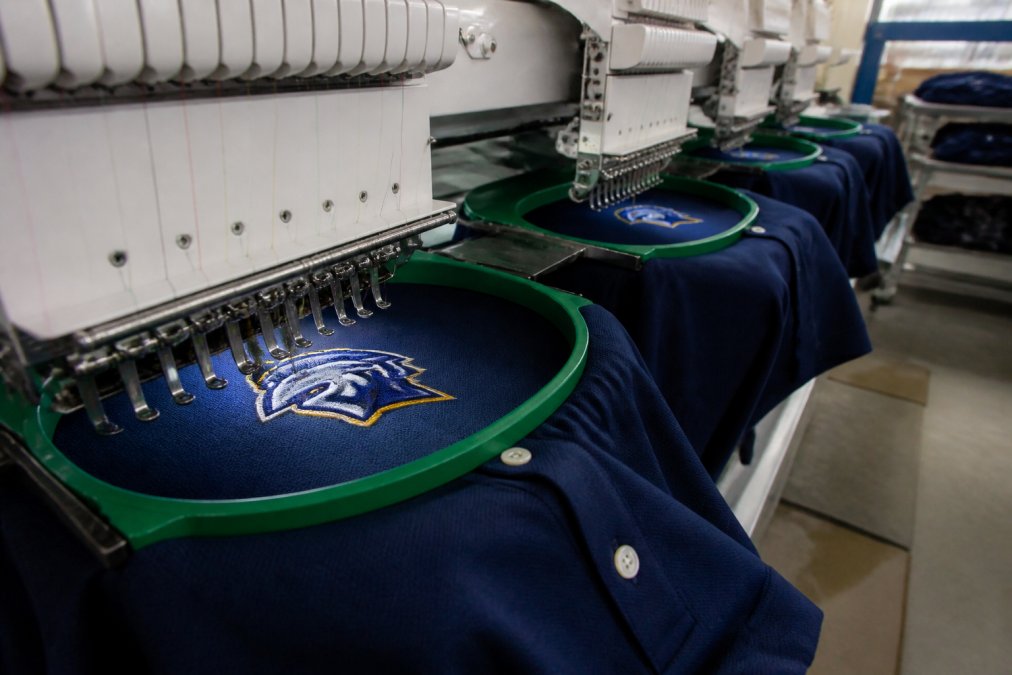
Here is what a complete service actually covers:
- Digitization of your logo into a machine-readable stitch file
- Garment sourcing across polos, workwear, headwear, and outerwear
- Thread color matching to your brand palette
- Embroidery placement mapped to each garment style
- Proof approval before anything runs on the machine
- Production and finishing, including trimming and pressing
The gap between a cheap provider and a careful one shows up here, not in the invoice. Choosing on price per piece alone and ignoring whether digitization is included is a common mistake: teams that skip that question pay a setup fee later, or receive a stitch file they cannot reuse when they switch vendors.
The single most important thing to confirm before ordering: is digitization included, and do you own the resulting file? That one answer separates a smooth reorder from a rebuild.
Logo Digitization for Embroidery: Turning Artwork Into Stitches
Logo digitization for embroidery converts your artwork into a stitch file that tells an embroidery machine exactly where, in what order, and how densely to sew. It decides whether your logo looks crisp or amateurish, and it is the step most buyers never see.
How the Digitizing Process Works
A digitizer rebuilds your artwork as paths and stitch types: satin for borders, fill for large areas, running stitches for fine detail. They set stitch density, adjust thread tension, and add embroidery backing so the fabric does not distort under the needle.
The output is a stitch file, not an image. You cannot edit it in a photo editor or scale it up without re-digitizing. That is why a logo that looks fine on a business card can fall apart on a left-chest placement: at small sizes, thin lines and tight text merge into an unreadable blob.
Three variables drive the outcome:
- Size and placement. A left-chest logo runs small; a full-back logo runs large. Each needs its own digitized version.
- Fabric. A structured cap and a soft tri-blend polo behave differently under the needle. The digitizer compensates for that.
- Detail level. Fine text, gradients, and thin outlines need adjustment to survive as thread.
A good digitizer also flags design elements that will not work at your chosen size and suggests a fix before production.
Custom Embroidery File Requirements: What to Send
Custom embroidery file requirements are simpler than most people fear. You do not need a professional designer or a native embroidery file, just the best version of your artwork you have.
Send whichever of these you have, in this order of preference:
| File You Have | Format | What the Digitizer Does With It |
|---|---|---|
| Vector artwork | .AI.EPS.PDF.SVG | Cleanest conversion, fewest edits |
| High-res raster | .PNG.JPG at large size | Traces edges, may need cleanup |
| Low-res or photo | Screenshot, scan, phone photo | Rebuilds from scratch, quotes manually |
| Physical sample | Patch, old shirt, business card | Scanned or measured, then rebuilt |
Vector artwork is the gold standard because it scales without losing edge definition. If you only have a small logo from a website, send the largest version you can find.
Fixing Low-Quality or Missing Files
Low-quality artwork is not a dead end. A digitizer can redraw a logo from a clean reference, rebuild text as actual letterforms, and correct pantone color values from a brand guide. It takes longer and usually triggers a setup charge, but the result is a reusable file you keep.
Two things speed this up:
- A brand guide with exact colors and fonts
- A short note on what the logo must never look like when reproduced
If you have neither, describe the colors in plain terms and let the digitizer match to a thread color chart. Physical thread never matches a screen pixel exactly, so expect a close match.
Never approve a proof from a phone screen in bright sunlight. Colors shift dramatically between displays, and a logo that looks correct on your phone can read as the wrong shade on a finished garment. Approve proofs on a calibrated monitor or against a printed thread chart.
Choosing Garments and Logo Placement
Garment selection is where embroidery quality is won or lost before the machine starts. A dense, detailed logo needs a stable fabric; a lightweight, open-weave shirt shows every stitch pull. For team and corporate programs, the practical answer is usually a mid-weight polo or structured workwear piece.
Fabric weight is the number to check first. Heavier knits and wovens resist distortion through repeated washing; lighter fabrics can work but need a stabilizer behind the logo and a less dense stitch pattern.
Placement follows function:
- Left chest for corporate identity on polos and button-downs
- Full back for team names, numbers, and large marks
- Headwear front for caps, where a structured crown is essential
- Sleeve or cuff for secondary branding and sponsor marks
For uniform programs, lock the placement specs once and reuse them. Consistent placement across every reorder is what makes a staff or team look coordinated rather than assembled piecemeal.
The Cost of Custom Logo Embroidery: What Drives Pricing
The cost of custom logo embroidery depends on quantity, stitch count, garment choice, and whether digitization is included. There is no single per-piece number, which is why a quote beats a rate card, but you can budget realistically if you understand the four levers that move the number.
The Four Levers, With Real Numbers
1. Stitch count. Machine time is billed in stitches, and most commercial shops quote in blocks of 1,000. A simple one-color left-chest mark often lands between 4,000 and 7,000 stitches; a dense multi-color logo with fine text or a full-back design can run 15,000 to 25,000 or more (peer-reviewed research). Every additional 1,000 stitches adds machine time and thread, usually passed through as a per-1,000-stitch charge.
2. Quantity. Digitizing is a one-time setup. Spread across 12 pieces it is a meaningful per-unit cost; across 500 pieces it nearly disappears. That is why the per-piece price on a 24-piece team order is always higher than on a 250-piece corporate rollout of the same logo. embroidery machine guide.
3. Garment. The blank is frequently the largest single line item. A basic cotton tee might sit in the low single digits per unit at volume, a mid-weight polo in the teens, and a premium soft-shell jacket well north of that before a single stitch is sewn. Buyers who fixate on embroidery cost while ignoring the blank are optimizing the smaller number.
4. Digitization. A one-time setup cost, not a per-piece charge. Ask whether it is included and whether you keep the file. A file you own is an asset you can take to another vendor; a file you rent is leverage the vendor keeps.
What a Realistic Budget Looks Like
A decorated polo with a standard left-chest logo lands in a broad middle band once you combine blank, amortized digitizing, and stitching. The exact figure swings widely with garment tier and stitch count, so treat any published per-piece number as a starting point, not a quote.
For current pricing on your specific order, request a quote directly from Piercy Sports and Apparel. Rates shift with garment availability and order size, so a live quote is the only number worth trusting.
Embroidery vs. Screen Printing vs. Heat Transfer: A Cost-Benefit Look
Embroidery, screen printing, and heat transfer solve different problems. The right choice comes down to quantity, durability, and how the piece will be worn.
| Factor | Embroidery | Screen Printing | Heat Transfer |
|---|---|---|---|
| Best for | Low to mid quantity, textured look, uniforms | High quantity, flat graphics, spirit wear | Small runs, names and numbers, quick turnarounds |
| Durability | Outlasts the garment in most cases | Can crack or fade with wear | Can peel or lift at edges over time |
| Detail limit | Fine text needs adjustment | Handles fine detail well | Handles fine detail well |
| Per-unit cost | Higher at low volume, competitive at mid volume | Drops sharply at high volume | Low setup, higher per-unit at scale |
| Setup | One-time digitizing | Per-color screen setup | Per-design cut setup |
| Feel | Raised, dimensional | Flat, sits on fabric | Flat, can feel rubbery |
For a 15-person youth league, embroidery on polos and caps usually wins on durability and perceived quality. For hundreds of basic tees, screen printing often makes more financial sense, and heat transfer is the pragmatic pick for individual names and numbers on a small run. Many programs use all three.
The cheapest per-piece quote is rarely the cheapest order. Compare total cost of ownership: blank quality, stitch count, whether digitizing is included, and whether you own the file. That is the number that matters at reorder time.
Minimums, Turnaround Times, and Reorders
Minimums and turnaround times decide whether a vendor fits your timeline. Ask both before you commit, and get the answer in writing.
Why Minimums Exist
Minimum order quantity varies by decoration type and garment, some providers set a floor per design, others per style. The floor is not arbitrary: embroidery runs on multi-head machines, and a digitized file must be loaded, hooped, and tested before the first good piece comes off. A run of three carries almost the same setup labor as a run of thirty.
Most embroidery shops set a per-design minimum of 6 to 12 pieces, though some will run a single sample for a proofing fee; screen printing minimums tend to be higher because each color needs its own screen (sba.gov). If you are a small league, confirm the floor before you build a budget around a number that does not exist.
How Turnaround Actually Flows
Turnaround time runs from proof approval, not from the day you first email. That distinction trips up first-time buyers. A six-week deadline sounds generous until you learn that production alone can consume several weeks and the clock only starts after you sign off on the proof.
The sequence usually looks like this:
- Artwork review and digitizing, typically a few business days, longer if the artwork needs to be rebuilt from scratch.
- Proof sent for approval, the clock is now on you.
- Proof approval, the production clock starts here.
- Garment sourcing, in-stock blanks move fast; special-order or backordered styles can add days or weeks.
- Production, a small run can finish in a day or two once it is on the machine; large runs are scheduled across multiple days.
- Finishing and shipping, trimming, pressing, packing, and transit.
Standard in-stock orders typically ship within one to two weeks of proof approval, while large or special-order programs run longer. Treat those as planning ranges, not promises.
To keep a season on schedule:
- Approve the proof within a day or two of receiving it
- Confirm garment availability before finalizing the roster count
- Build a buffer for shipping, especially for dated events
- Ask whether rush production is available and what it costs
Reorders
Reorders are where a good provider proves itself. If your file is on record and your placement specs are locked, a mid-season addition should be a quick run, not a rebuild. Ask upfront whether reorders carry a fresh setup charge or reuse your existing file.
Two details decide how smooth a reorder goes: whether the original garment is still in stock in the sizes you need (discontinued blanks are the most common reason a reorder looks different), and whether your placement specs were documented. A shop that recorded the exact logo position, size, and thread colors can reproduce the piece months later; one that eyeballed it cannot.
Before you place the first order, ask the vendor to confirm in writing that your digitized file and placement specs will be archived and reused on reorders at no additional setup charge. That single email prevents most reorder surprises.
Caring for Embroidered Apparel So Logos Last
Embroidered logos outlast most decoration methods, but they are not indestructible, how you treat the garment decides how long the branding stays sharp.
Wash embroidered apparel inside out in cold water on a gentle cycle (cleaninginstitute.org). Skip the dryer when you can, heat and tumbling abrade the stitching and cause pilling; if you must dry, use low heat. Never iron directly over the embroidery, because a hot iron flattens the raised stitch and leaves a permanent shine.
A few habits extend the life of every piece:
- Turn garments inside out before washing
- Avoid bleach and fabric softener, which break down thread and backing
- Hang or lay flat to dry when possible
- Spot clean small marks rather than running a full wash
Treat the care routine as part of the uniform program. When everyone follows the same washing instructions, the whole team looks consistent for longer, and apparel durability stops being a variable you have to budget around.
Getting a logo onto apparel is easy. Getting it to look right on the first run, hold up through a full season, and reorder cleanly next year is the actual challenge. Piercy Sports and Apparel handles the parts that trip people up, from digitizing rough artwork into a reusable stitch file to matching thread colors and locking placement specs across a uniform program. Our one-stop setup covers custom team uniforms, business apparel, and promotional items with fast, reliable turnaround times, so you are not juggling three vendors to dress one roster. Get started with Piercy Sports and Apparel and give your team or staff branding that looks professional from the first stitch to the last reorder.
Frequently Asked Questions
How much does it cost to have a logo embroidered?
The cost of custom logo embroidery depends on stitch count, garment type, order quantity, and whether digitizing is needed. A one-time logo setup fee covers converting your artwork into a stitch file, and per-piece pricing drops as quantity rises. Piercy Sports and Apparel quotes each project individually, so request a quote with your logo, garment choice, and quantity for exact numbers.
What file formats are required for professional logo embroidery?
Send vector artwork when possible: AI, EPS, PDF, or SVG files scale cleanly and give digitizers the sharpest edges to work from. High-resolution PNG or JPG files at 300 DPI can also work. If your logo only exists as a low-quality image, a digitizer can often redraw it, though cleanup may add to the logo setup fee. Include Pantone color references so thread matching stays accurate.
How does the logo digitization process work?
A digitizer converts your artwork into a stitch file by mapping stitch density, thread count, underlay, and embroidery backing for your chosen fabric. You review a digital proof, request changes, and approve before production. This proof approval step prevents surprises on finished garments. Once approved, the file is saved for future reorders, so repeat orders skip the setup work.
Do small orders require a minimum order quantity?
Many embroidery shops set minimums, but small youth leagues and family orders can often be accommodated. Ask about per-piece minimums and reorder policies before committing. A shop that stores your digitized file makes mid-season roster additions simple, since new names or numbers can be added without paying the logo setup fee again.