Last Updated: November 2, 2026
Quick Summary
Manage team uniform sizing and distribution with a five-stage workflow: plan the roster and styles, collect sizes through one form with a deadline, check the size chart against real measurements, order with a buffer for late additions, and distribute against a signed checklist. Collecting sizes once in a sortable format and handing out garments against a written record removes most of the back-and-forth.
- Set the size submission deadline at least two weeks before you place the order.
- Ask for body measurements rather than self-reported sizes to cut exchanges.
- Sort the order form by team, then by size, to send a clean breakdown to production.
- Hold a buffer of the two or three most common sizes plus one unit at each edge.
- Have each person sign or initial a receipt line next to their name at distribution.
Table of Contents
- Build a Sizing and Distribution Workflow That Runs Itself
- Collecting Employee and Player Sizes Without the Back-and-Forth
- How to Read a Team Uniform Size Chart
- Putting Together a Team Uniform Order Form Template
- Setting Team Apparel Ordering Deadlines
- Estimating Quantities When Sizes Are Missing
- Your Team Uniform Distribution Checklist
- Plan Your Uniform Rollout with Piercy Sports and Apparel
- Frequently Asked Questions
Build a Sizing and Distribution Workflow That Runs Itself
Managing team uniform sizing and distribution comes down to one principle: collect sizes once, in a format you can sort, and hand out garments against a written record. Coaches and managers often lose weeks to group texts and lost paper forms. A simple workflow removes most of that pain.
The workflow has five stages:
- Plan the roster and styles before you collect anything
- Collect sizes through one form, with a deadline
- Check the size chart against real measurements
- Order with a buffer for late additions
- Distribute against a signed checklist
Below, we walk through each stage with the exact forms and checklists we would use.
Collecting Employee and Player Sizes Without the Back-and-Forth
One submission form, one deadline, one reminder. That is the whole trick. Most back-and-forth comes from collecting sizes in three places at once: texts, emails, and a clipboard at practice.
Set up a single collection point. A shared spreadsheet or a simple online form both work. Give every person one row and ask for:
- Name and contact number
- Team, department, or role
- Height and weight
- Chest or bust measurement
- Waist measurement
- Preferred fit, if the garment offers options
Then stop chasing individually. Send one reminder to the whole group, not twelve separate messages.
Self-Reported Sizes vs. Body Measurements
Self-reported sizes are fast but unreliable. Body measurements take more effort but cut exchanges. For youth leagues, a parent-reported size is often a guess. For staff apparel worn daily, a tape measure is worth the five minutes.
A common mistake is asking for “size” alone. Ask for measurements and let the size chart do the work. If you want a detailed walkthrough of measuring staff accurately, our guide on measuring staff for uniforms accurately covers the tape-measure steps.
Privacy and Secure Handling of Measurements
Height and weight are personal data. Treat them that way. Keep the size list in one restricted file, share it only with the people placing the order, and delete old lists once the season ends. Do not post a size sheet on a team group chat. Ask for measurements, not opinions about bodies, and keep the tone neutral.
How to Read a Team Uniform Size Chart
A team uniform size chart maps body measurements to garment sizes, and it is the single most useful document in the whole process. Read it before you collect a single number.
Charts differ by brand and by style, so never assume a medium is a medium. Check three things:
- Which measurement the chart uses. Some use chest, some use waist, some use both.
- Whether the chart is for body or garment. Garment measurements include room to move.
- Where the size breaks fall. A 38-inch chest may sit at the top of medium or the bottom of large.
For youth programs, our youth sports uniform ordering guide includes sizing charts and order forms you can hand straight to parents.
Putting Together a Team Uniform Order Form Template
A good order form template turns a messy roster into a clean bulk order. Build it once, reuse it every season.
Include these columns:
| Field | What to Capture | Example Entry |
|---|---|---|
| Player or staff name | Full name as it appears on the roster | Jordan Reyes |
| Team or department | Group the order will be sorted by | U12 Blue |
| Jersey size | Size from the chart | Youth L |
| Short size | Size from the chart | Youth L |
| Number or name | Decoration detail | 14 / REYES |
| Quantity | Units requested | 1 |
| Submitted | Date the form came back | 03/14 |
Sort by team, then by size. That gives you a size breakdown you can send straight to production. For the end-to-end steps, see our guide on managing team jersey orders.
Setting Team Apparel Ordering Deadlines
Work backward from the first game, not forward from today. Team apparel ordering deadlines should leave room for production, decoration, shipping, and a buffer.
Set three dates and publish all of them:
- Size submission deadline: at least two weeks before you order
- Order deadline: the date the final count goes to production
- Delivery deadline: one to two weeks before the season opener
If you are unsure how long decoration adds, our breakdown of bulk embroidery turnaround time walks through a step-by-step timeline. Share the real dates with your group, not vague ones.
Estimating Quantities When Sizes Are Missing
Order a size distribution, not a guess, and plan the buffer as part of the same decision. When a few people never submit, use the rest of the roster to estimate, then connect that estimate to your replacement stock and exchange process so a missing size does not become a mid-season emergency.
A practical method:
- Sort the sizes you do have into a percentage breakdown by garment and by group.
- Apply that breakdown to the missing headcount, rounding to whole units.
- Round up on the two most common sizes and on the sizes at the edges of your range.
- Add a buffer of middle sizes sized to your roster churn and exchange history.
- Record the estimate and the buffer separately so you can compare them next cycle.
Keep a few extra middle sizes on hand. They cover mid-season roster changes and a replacement uniform without a new order. Track what you hold in a simple inventory sheet so you know when to replenish.
Sizing the Buffer to Your Exchange and Replenishment Reality
The right buffer is not a fixed number. It depends on how often your program exchanges sizes, how many new hires or late roster additions you expect, and how long your supplier’s reorder lead time runs. A common pattern is to hold a small buffer of the two or three most common sizes plus one unit at each edge of the size range, then adjust after the first season once you have real exchange data.
Track three numbers each cycle: the share of wearers who requested an exchange, the number of late additions after the order deadline, and the number of replacement garments issued mid-season. Those three numbers tell you whether next year’s buffer should grow or shrink.
Returns, Exchanges, and Ongoing Replenishment
Missing sizes and wrong sizes are the same problem seen from two angles, so handle them in one process. Set a clear exchange window, define who approves an exchange, and record every exchange against the original assignment. For new hires and role changes, keep a standing replenishment order rather than placing a one-off order each time.
Damaged garments need their own path: record the damage, issue a replacement from buffer stock, and note whether the damage is a warranty issue with the supplier. Over a few cycles, the exchange and damage logs become the most useful planning documents you have.
Watch out: treating the buffer as a fixed number and never reviewing it is how programs end up with a shelf of the wrong sizes and a shortage of the right ones.
Your Team Uniform Distribution Checklist
Distribution is where good planning shows, and it is also where most programs lose track of garments. Hand out uniforms against a written record, one team at a time, and build in proof of receipt so you can resolve disputes later.
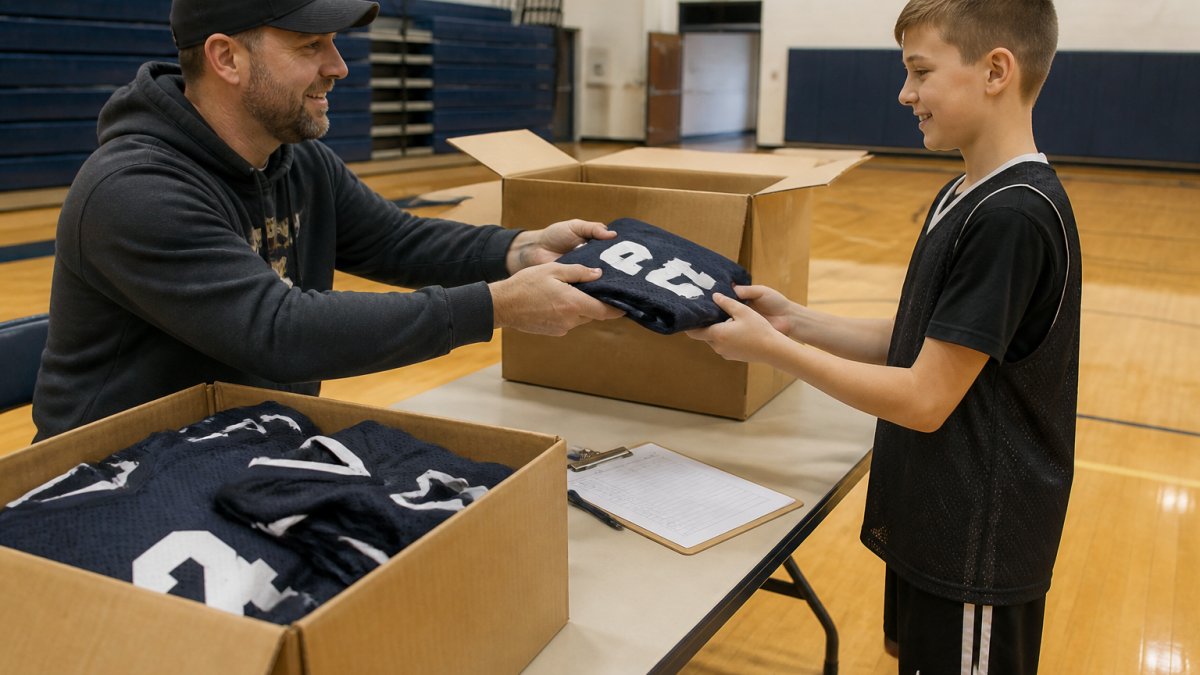
Use this checklist as your distribution run sheet:
- Pack garments by team and label each box with the team name and count
- Print a name-and-size list for each team, sorted alphabetically
- Set one distribution time and place, and publish it with the size deadline
- Have each person sign or initial a receipt line next to their name
- Note any fit issues on the spot and mark them for exchange
- Record unclaimed garments and set a follow-up date
- Log every transfer when a garment moves between people
- Keep a small replacement stock and track it in the same inventory sheet
A sign-off sheet is the difference between a clean handoff and a season of “I never got mine” disputes.
Recording Assignments and Proof of Receipt
A signature line is the minimum. For larger programs, add a garment number or asset tag to each item and record it against the person. That single field lets you trace a specific jacket back to a specific wearer if it turns up in a lost-and-found bin or needs replacement.
Keep the signed sheet or a scanned copy for the season. If a dispute arises, the record shows who received what and when. A common pattern is to photograph the signed sheet at the end of each distribution session and store it in the same restricted folder as the size list.
Handling Unclaimed Packages and Transfers
Not everyone shows up. Set a clear unclaimed-package process: hold garments for a defined window, send one follow-up to the whole group, then return unclaimed items to replacement stock and note the change in inventory.
Transfers happen constantly, a player moves teams, a staff member changes roles, a garment is handed down. Log every transfer with the date, the from-person, the to-person, and the garment number. Without that log, your inventory count drifts and you cannot tell a lost garment from a transferred one.
Watch out: handing out uniforms without a sign-off sheet and a garment number is how garments vanish and how nobody can prove who received what.
Plan Your Uniform Rollout with Piercy Sports and Apparel
A sizing and distribution workflow only works if the garments arrive right and on time. That is where we come in. Piercy Sports and Apparel handles custom team uniforms, business apparel, and sports gear with high-resolution digital printing, premium embroidery, and screen printing, built for durability and performance.
We tailor solutions to match your vision. When you are ready to order, our guide to buying custom sports team uniforms covers decoration methods, sizing tips, and ordering steps.
Frequently Asked Questions
How do you collect uniform sizes from a team?
Send a single digital form to every player or employee that asks for name, role, department or position, and size selections for each garment. Set one deadline and send two reminders. For anyone who misses it, follow up individually rather than reopening the form, which keeps your team uniform sizing data clean and your order moving.
When should you order team uniforms before a season starts?
Work backward from your first game or launch date. Allow time for size collection, finalizing quantities and artwork, and then confirm the production and delivery window with your vendor before you promise anything to families. Build in a buffer for exchanges. Ask your supplier in writing how fast they can turn around a reorder for mid-season roster changes.
How do you handle uniform exchanges after distribution?
Set an exchange window after handoff and state it in the distribution checklist. Keep a small reserve of the most common sizes so you can swap on the spot instead of placing a new order. Record every exchange on the same roster you used for sizing. That log tells you which sizes to adjust next season and gives you a realistic exchange rate for budgeting.
What information should a team uniform size form include?
Ask for full name, contact email, team or department, position or role, and the size for each item in the order. Add a field for a preferred number or name personalization if that applies. Keep the form to one page so completion rates stay high and late size submissions stay low.
Ready to take the guesswork out of your next order? Get started with Piercy Sports and Apparel and build a uniform program your whole team can count on.