Table of Contents
- Define Your Team Identity and Values First
- Select the Right Fabric and Material for Performance
- Screen Printing vs Embroidery for Team Gear: Which Method Wins
- Best Practices for Team Logo Placement and Sizing
- Choose a Color Palette That Stands Out and Lasts
- Custom Sports Uniform Design Software and File Preparation
- Balance Style, Functionality, and Budget in Custom Team Gear Design
- Frequently Asked Questions
Last Updated: September 22, 2026
Define Your Team Identity and Values First
Your team identity is the foundation of every design decision. Before selecting colors, fonts, or logo placement, clarify what your team stands for, this is where custom team gear design begins, not with aesthetics, but with purpose.
Document your team’s core values: Are you competitive and aggressive? Disciplined and precise? Inclusive and community-focused? Your brand identity should reflect those attributes visually. The strongest designs emerge when coaches and managers first define what their team represents.
Ask: What does your mascot symbolize? What legacy do you want to build? What message should opponents and fans receive when they see your uniforms? These answers drive every subsequent choice in custom team gear design.
Document your team’s personality in writing as your design brief. Share it with your designer or apparel service. The clearer your team identity, the more cohesive your final product will be.
A common mistake is designing based on what looks trendy rather than what represents your team authentically. Trends fade. Team identity lasts.
Select the Right Fabric and Material for Performance
The fabric you choose determines performance, durability, moisture management, and environmental impact. Your material choices should align with your team’s values and practical needs.
Traditional Performance Fabrics
Moisture-wicking synthetic blends (polyester or nylon) pull sweat away and dry quickly, ideal for active sports. Cotton offers breathability but absorbs moisture and dries slowly. Polyester blends provide durability and color retention for screen printing and embroidery.
Most coaches prioritize a blend: polyester for durability combined with cotton or moisture-wicking synthetics for comfort. A typical performance blend is 60% polyester / 40% cotton or 100% polyester with a moisture-wicking finish.
Consider your sport’s climate and intensity. Summer heat requires aggressive moisture-wicking; indoor sports can use heavier fabric for better structure. Fabric stiffness affects how logo placement and design elements appear on the body.
Sustainable and Eco-Friendly Fabric Options
Sustainable fabrics reduce water consumption, chemical use, and carbon footprint. These options are now available at competitive price points and perform as well as traditional materials.
Recycled Polyester: Made from post-consumer plastic bottles or textile waste, recycled polyester has the same moisture-wicking and durability as virgin polyester but requires less energy to produce and carries a lower environmental footprint. Many providers offer it without price premiums.
Organic Cotton: Grown without synthetic pesticides or fertilizers, organic cotton is softer and safer for sensitive skin. It requires less water than conventional cotton and supports healthier soil, though it retains moisture-absorption drawbacks.
Bamboo Fabric: Bamboo viscose grows rapidly without pesticides and regenerates after harvest. Bamboo fabric is silky, breathable, and naturally antimicrobial. Bamboo blends (bamboo/polyester) combine sustainability with performance.
Tencel (Lyocell): Made from sustainably harvested wood pulp using a closed-loop process that recycles 99% of solvents. Tencel is soft, breathable, and biodegradable, offering premium feel and strong sustainability credentials at higher cost.
Blended Sustainable Options: Many providers now offer blends like 50% recycled polyester / 50% organic cotton or 60% recycled polyester / 40% bamboo. These blends balance performance, comfort, and environmental responsibility.
Durability and Longevity as Sustainability
The most sustainable garment lasts longest. Ask your provider about colorfastness and seam durability. A uniform lasting three seasons is more sustainable than a cheaper uniform failing after one, even if the cheaper option uses recycled materials.
Ethical Manufacturing Considerations
Consider where and how your apparel is manufactured. If sustainability and ethics matter to your organization, ask your apparel provider about manufacturing partners’ certifications (Fair Trade, GOTS, or similar).
Practical Fabric Selection for Your Team
Clarify your priorities: performance and durability favor polyester blends; environmental impact favors recycled polyester; comfort and natural feel favor organic cotton or bamboo blends. Request fabric samples and test them, wash a sample to see how it performs. A fabric that looks good in a catalog may not feel right on an athlete’s body.
Cheap, thin fabric, whether conventional or “eco-friendly”, will make even excellent embroidery and screen printing look mediocre. The base material quality matters as much as the print method, regardless of sustainability claims.
Screen Printing vs Embroidery for Team Gear: Which Method Wins
Screen printing and embroidery are standard methods for applying designs to custom team gear design, but they serve different purposes and have distinct trade-offs.
Screen printing applies ink directly to fabric through a mesh screen. It’s cost-effective for large orders and produces vibrant colors. It excels for solid-color logos and bold graphics.
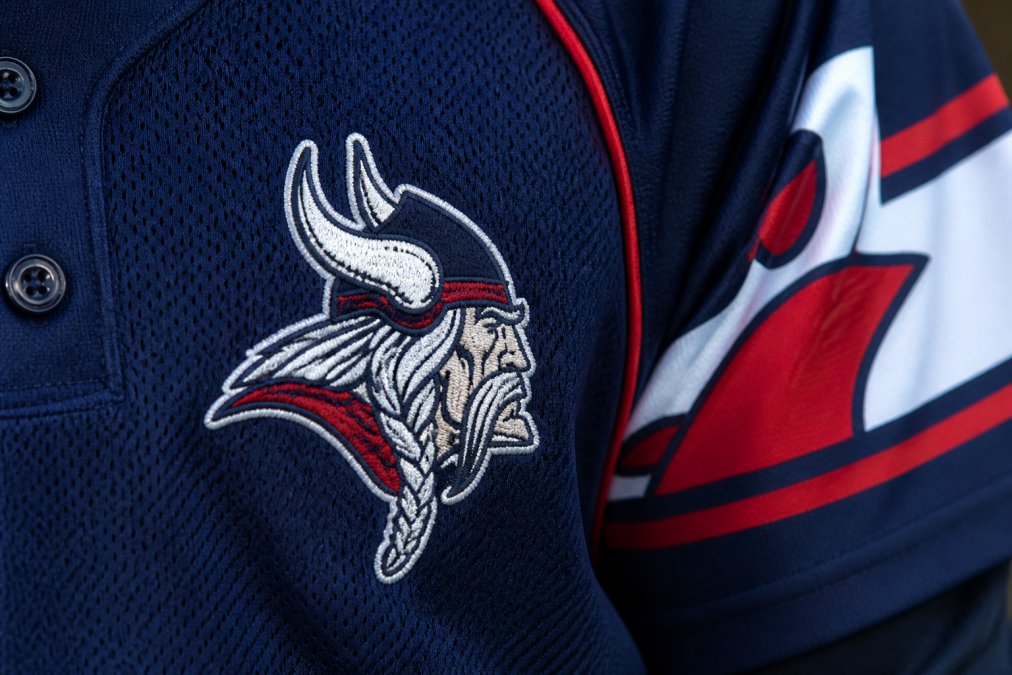
Embroidery stitches designs directly into fabric, creating a three-dimensional, durable result. The trade-off: works better with simpler designs without fine detail.
Many teams use both methods on the same garment, screen-printed base design on the chest paired with embroidered team name on the back.
The choice depends on your budget, design complexity, and how long you need the uniforms to last.
Best Practices for Team Logo Placement and Sizing
Logo placement determines how your design reads on the human body. The chest is primary real estate, size logos 3-5 inches wide to be visible from 10-15 feet away. Position centered horizontally in the upper-middle chest, not too high (crowding the neckline) or too low (hidden when arms raise).
Back logos should be sized larger than chest versions (4-8 inches) since viewers are farther away.
Sleeve logos should be small and simple, detailed designs distort as fabric curves around the arm. Use small marks, initials, or secondary logos rather than complex primary logos.
Avoid high-stress areas (seams, armholes, sleeve caps) where bunching distorts designs and causes premature wear. Map placement on actual garment templates, not flat mockups.
The best logo placement balances visual hierarchy with practical durability. Your primary mark belongs where it’s most visible and least stressed.
Choose a Color Palette That Stands Out and Lasts
Your color palette is the first thing people notice about your custom team gear design. Start with 2-3 primary colors maximum. Your primary color should be distinctive; secondary colors support without competing for attention.
Ensure contrast, dark logos disappear on dark shirts; light logos on light fabric do the same. Test color combinations on actual fabric samples, not just screen mockups, as lighting changes how colors appear.
Some dyes fade faster than others, especially in sunlight or after repeated washing. Synthetic fabrics hold color better than natural fibers. Ask your apparel provider how specific colors perform on your chosen fabric and printing method.
Stick with classic team colors when possible, they age better and maintain brand consistency across multiple seasons.
Custom Sports Uniform Design Software and File Preparation
File preparation is critical, a technically sound design can produce poor results if the file format, color mode, or resolution doesn’t match your printing method’s requirements. Understanding these requirements upfront prevents costly reprints and delays.
Vector vs. Raster: Why It Matters
Vector files (created in Adobe Illustrator, Corel Draw, or Affinity Designer) use mathematical formulas and scale infinitely without losing quality. Raster files (JPG, PNG, bitmap) are made of pixels and blur when enlarged, especially problematic for embroidery where pixelated edges look unprofessional. Always use vector files for primary logos.
Request vector files for your primary logo and design elements. If you only have a raster version, ask your apparel provider if they can vectorize it.
Color Mode: CMYK vs. RGB
RGB (Red, Green, Blue) is the screen standard; CMYK (Cyan, Magenta, Yellow, Black) is the print standard. When you send an RGB file to a screen printer, colors shift during conversion, bright blues may print darker, reds may shift toward orange.
Convert your design to CMYK color mode before sending to your printer or embroidery service.
Resolution and DPI for Raster Elements
Raster components (photographs, gradients, textured backgrounds) must be at least 300 DPI. Files below 150 DPI appear blurry or pixelated. For embroidery, high resolution is less critical, but screen printing and direct-to-garment printing require it.
File Format Specifications by Printing Method
Always ask your apparel provider what file formats and specifications they require before you finalize your design. Different vendors may have slightly different requirements.
Documentation and Communication
Include a design specification document with: final dimensions, placement location, special instructions, quantity, and garment sizes.
Common File Preparation Mistakes to Avoid
- Submitting RGB files to a screen printer
- Using raster logos at oversized dimensions
- Including fonts without converting them to outlines
- Sending low-resolution mockups as final files
- Forgetting bleed area for edge-to-edge designs
If you’re unsure whether your files are print-ready, ask your apparel provider to review them before production.
Balance Style, Functionality, and Budget in Custom Team Gear Design
Functionality comes first. Uniforms that don’t perform in your sport are failures, regardless of appearance. A beautiful jersey that restricts arm movement or causes chafing creates game-day problems. Test designs on actual athletes before committing to full production if possible.
Style should reinforce team identity and create visual distinction.
| Design Element | Impact on Durability | Cost Level | Best Practice |
|---|---|---|---|
| Embroidered primary logo | Very high | Higher | Invest here for longevity |
| Screen-printed secondary design | Medium | Lower | Use for accent elements |
| Multi-color embroidery | High | Highest | Reserve for premium pieces |
| Single-color screen print | Medium | Lowest | Base design option |
| Fabric quality | Critical | Varies | Non-negotiable foundation |
Frequently Asked Questions
What file formats work best for custom team gear design?
Ask your apparel provider what file formats and specifications they require before you finalize your design.
How do I choose the right colors for team uniforms?
Start with your team identity: school colors, league traditions, or brand standards. Ensure high contrast between your primary color and any secondary colors so your design reads clearly from a distance. Test color combinations on mockups before committing to production.
What’s the difference between screen printing and embroidery for team gear?
Screen printing uses ink applied through mesh screens and offers vibrant colors. Embroidery uses thread stitched into fabric, creating a textured, premium look that’s extremely durable.
How do I ensure my team logo looks good on different apparel sizes?
Design your logo with visual hierarchy in mind, keep the main element readable even when scaled down to 2 inches. Test your placement on multiple sizes before production. Place logos on the chest or sleeve where they remain proportional across XS to XL sizes. Avoid thin lines or fine details that become unclear on smaller garments. Work with your printer to create size-specific mockups so you see exactly how your design appears on youth and adult sizes.