Last Updated: October 30, 2026
Quick Summary
To measure staff for uniforms accurately, use a soft tape, measure each person standing straight and relaxed, and take every measurement twice. Record neck, chest or bust, waist, hips, sleeve length, body length and inseam, then compare the numbers against your supplier’s size chart.
- Use a flexible measuring tape, since a rigid ruler cannot follow the curves of the body.
- Take each measurement twice, and measure a third time if the readings differ by more than half an inch.
- Measure the neck at the base where a collar sits, with one finger of room.
- Measure sleeve length with the arm bent at the elbow and the hand on the hip.
- Measure inseam from the crotch seam down to the desired hem point, not down the outside of the leg.
Table of Contents
- Why Accurate Staff Uniform Sizing Matters
- Preparing Staff and Your Measuring Tools
- Measuring Each Body Point Step by Step
- Body Measurements vs Garment Measurements
- Building an Employee Uniform Sizing Checklist
- Collecting Sizes with a Uniform Size Collection Form
- Turning Measurements into a Uniform Size Chart for Employees
- Ordering Your Staff Uniforms from Piercy Sports and Apparel
- Frequently Asked Questions
Getting uniform sizes right the first time saves money, time, and frustration. A staff member gets a shirt too tight in the shoulders or too long in the sleeves, and the whole order has to be fixed. Measuring staff for uniforms is not hard, but it takes a plan.
Why Accurate Staff Uniform Sizing Matters
Accurate sizing is the difference between uniforms people wear and uniforms that sit in a closet. A shirt that pulls across the chest restricts movement, and pants that are too short look unprofessional.
Sizing mistakes also cost money. Exchanges, reorders, and alterations add time and expense and can push back the date your team needs its uniforms.
Preparing Staff and Your Measuring Tools
Before you measure anyone, gather a flexible measuring tape, a pen, and a sizing form or notepad.
- Choose a private room with a mirror and good lighting
- Let each person know what to expect and why you are measuring
- Ask staff to wear light clothing or measure over a thin layer
Measuring is more accurate when the person stands straight and relaxed, with feet together, arms at their sides, and weight evenly balanced.
If the person prefers, a second staff member can assist. Respect privacy at every step. Only the people who need the measurements should see them.
Measuring Each Body Point Step by Step
Take each measurement twice to catch errors. Write down the number right away, in inches, and check it against your second reading. If the two differ by more than half an inch, measure once more.
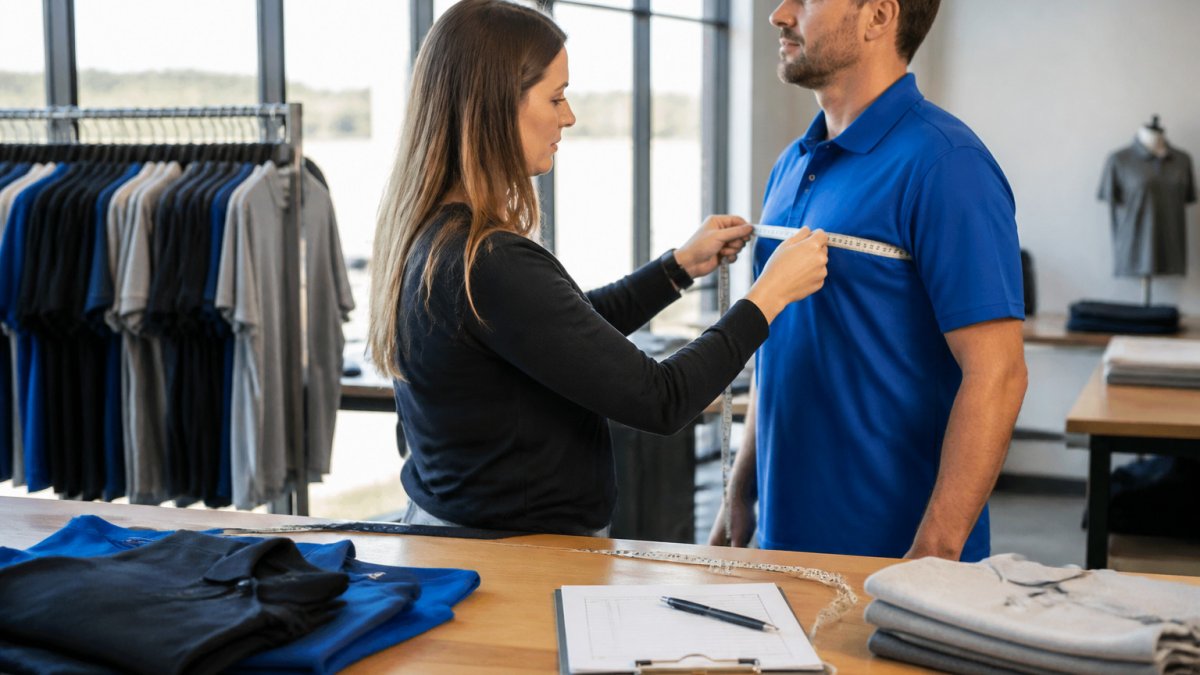
Work from the top of the body down so you do not lose your place, and record each number before moving to the next point.
Neck, Chest or Bust, and Waist
These three measurements set the core fit of most shirts and jackets.
Neck circumference: Wrap the tape around the base of the neck, where a collar would sit.
Chest or bust: Wrap the tape around the fullest part of the chest, keeping it level across the back.
Waist: Find the natural waist, the narrowest part of the torso, usually just above the belly button.
Hips, Sleeve Length, and Body Length
These measurements control how pants and longer tops fit.
Hips: Measure around the fullest part of the hips and seat, keeping the tape level. This number helps set the fit of pants and skirts.
Sleeve length: Bend the arm slightly at the elbow with the hand on the hip.
Pants also need an inseam, measured from the crotch down to the ankle, and a leg length if you plan to order cuffs or specific lengths.
Catching and Correcting Measurement Errors
- Repeat every measurement and compare the two readings. If they differ by more than half an inch, take a third reading and use the two that agree.
- Check tape level at the chest, waist, and hips by looking at the person from the side and the front. A tape that is level in front but sagging in back will read short.
- Watch for posture drift. People unconsciously straighten up or suck in when a tape touches them. Ask them to relax and exhale normally before you read the number.
When two readings disagree and you cannot resolve which is correct, measure a third time and take the median. For team orders, it is usually safer to round up to the next size than to round down, a slightly loose uniform can be altered, but a tight one cannot be let out much.
If a staff member has an unusual result, for example, a chest measurement that puts them between two very different sizes, flag it for a fit test rather than guessing. A sample garment in the two candidate sizes will settle the question faster than another round of measuring.
The article’s measurement steps can be summarised as a quick reference for each body point.
| Body point | How to measure | Common mistake |
|---|---|---|
| Neck | Tape at base of neck, one finger of room | Measuring too high toward the jaw |
| Chest or bust | Fullest point, tape level across back | Letting the tape dip in back |
| Waist | Natural waist, breathe normally | Holding the stomach in |
| Hips | Fullest part of hips and seat, pockets empty | Tape catching on a wallet or phone |
| Sleeve length | Arm bent at elbow, hand on hip | Measuring with the arm straight |
| Inseam | Crotch seam to desired hem point | Measuring down the outside of the leg |
| Any measurement | Take twice; redo if they differ by over half an inch | Skipping the second reading |
Body Measurements vs Garment Measurements
Body measurements describe the person. Garment measurements describe the finished piece of clothing. Many uniform suppliers publish garment sizes on a size chart. Knowing the difference keeps your orders accurate.
When you compare the two, match each body measurement to the garment chart, then add the comfort allowance the brand recommends. If you are unsure, ask your supplier which measurement system their chart uses before you order.
Building an Employee Uniform Sizing Checklist
- Confirm which uniform items each person needs
- Gather a flexible measuring tape, pen, and sizing form
- Set up a private, well-lit space
Keep a copy of the completed checklist with your order records. It helps with future reorders and new hires.
Collecting Sizes with a Uniform Size Collection Form
A uniform size collection form gathers everything you need in one place, especially useful when you outfit a large group. Staff can fill in their own details, which speeds up the process and reduces errors from handwriting.
A useful form includes these fields:
- Full name and department
- Uniform items needed, with quantities
- Neck, chest or bust, waist, hips, sleeve, and body length
Give staff clear instructions on the form. Offer to help anyone who has trouble measuring themselves, and let people request a private measurement if they prefer.
Turning Measurements into a Uniform Size Chart for Employees
After you collect all the measurements, turn them into a size chart you can review quickly. A size chart lists each person by name and maps their measurements to the sizes you will order.
Start by sorting staff into groups by the size they need for each item. Then count how many of each size you need. This count is your order quantity, and it helps you avoid ordering too many of one size and too few of another.
Here is a simple way to build the chart:
- List each employee and their measurements in a spreadsheet
- Match each measurement to the supplier’s size chart
- Choose the closest size, rounding up when the person falls between two sizes
- Count how many of each size you need for each item
- Review the totals with your manager before ordering
Connecting Measurements to Garment Ease and Size Selection
A body measurement is not a garment size. Every uniform style is cut with ease, the extra room built in so the wearer can move, layer, and work.
Before you lock in sizes, confirm three things with your supplier:
- Which measurement system the size chart uses. Some charts list body measurements; others list garment measurements taken flat. Mixing the two is the single most common cause of wrong sizes.
- How much ease the style is designed with. A fitted polo and a relaxed work shirt in the same labeled size will fit very differently.
- Whether the style runs true to size, small, or large. Ask for a sample if you are ordering more than a handful of pieces.
When a person falls between two sizes, the right choice depends on the garment and the job. For a shirt that will be tucked in and worn under an apron, size down for a cleaner look. For a jacket or a shirt worn over layers, size up.
Fit Testing in Real Work Tasks
Static measurements tell you how large a person is, not how the uniform behaves when they reach, bend, sit, or climb. Before you place a full order, have a few staff members wear a sample in the sizes you plan to order and run through the movements their job actually requires.
A practical fit test checks:
- Reach: raise both arms overhead and reach forward as if stocking a shelf or handing something to a customer
- Bend: bend at the waist and squat to pick something up from the floor
- Sit: sit, stand, and sit again to check that the shirt stays tucked and the pants do not bind
Ask testers where the garment pulls, gaps, or rides up. A shirt that gaps at the buttons when the wearer reaches is a size problem, not a posture problem.
Measurements get you close; a fit test gets you to wearable. Budget time for at least one sample fitting before a large order, and treat the test as a chance to catch size problems while they are still cheap to fix.
Handling Sizes Outside the Standard Chart
Not every staff member will fit a standard size chart, and a team-sizing process needs a plan for that before it becomes an emergency.
- Adaptive and accommodation needs. Ask staff privately whether they need adjustments such as longer sleeves, elastic waists, or open-back closures. Build these requests into the order rather than treating them as exceptions after delivery.
- Maternity and temporary fit changes. Order a size that accommodates the later stages of pregnancy, or plan for an interim alteration, so the staff member is not left without a wearable uniform mid-term.
- Gender-inclusive options. Offer unisex cuts where available and let staff choose the style that fits them, rather than assigning garments by gender. Measure the body, not the label.
Deciding Between Alterations and a Different Size
Some fit problems are better solved with an alteration than a different size. A pant that fits at the hip but is too long should be hemmed, not exchanged. A shirt that fits at the chest but is too long in the sleeve may need a sleeve alteration.
Record which staff members need alterations and what was done, so reorders and new hires can be handled consistently.
Keeping the Chart Accurate Over Time
A size chart is a living record. Refresh measurements when a staff member changes size significantly, when a new uniform style is introduced, or when a reorder is placed more than a year after the original.
Share the final chart only with the people who approve orders or handle alterations. Keep the original measurements saved in case anyone needs a size checked later, and store the file where access is limited to those who need it.
Ordering Your Staff Uniforms from Piercy Sports and Apparel
Once your sizes are confirmed, you are ready to order.
Before you contact us, gather these details:
- Your completed size chart with quantities for each item
- The logo or design file you plan to use
- Your preferred decoration method, such as embroidery or screen printing
Pricing depends on quantity, decoration method, and delivery date. Our buyer’s guide compares screen printing and embroidery and plans turnaround time to help you decide.
Accurate measurements make the whole process faster. With your size chart ready, your staff will get uniforms that fit well and look sharp from the first shift.
Frequently Asked Questions
How do you measure employees for uniforms?
Measure each person in lightweight clothing, with the tape held snug but not tight. Record neck circumference, chest or bust, waist at the natural waistline, hips at the fullest part, sleeve length from the shoulder point to the wrist, and body length from the high shoulder point down to the desired hem. Write each number on a form tied to the employee’s name so the numbers can be checked later. Taking two readings at each point and averaging them reduces most measurement errors before you place an order.
Should employees be measured over their clothes or directly on the body?
Measure over lightweight base layers, such as a thin t-shirt, rather than over bulky jackets, belts or tool pouches. Measuring over heavy clothing inflates the numbers and leads to garments that feel loose in daily work. If a person will wear a fleece or insulated layer under the uniform, note that on the form so the fit allows for it. Measuring in private with consent is the best approach for comfort and accuracy.
Should you use body measurements or garment measurements to order uniforms?
Body measurements describe the person, while garment measurements describe the finished piece of clothing laid flat, such as chest width across the garment or total body length. Many suppliers publish size charts in garment measurements, so comparing an employee’s body numbers against the chart can produce a poor fit. Use the size chart that matches the supplier’s published method, and add room for movement when the uniform must allow overhead reach or lifting. Confirm which method your supplier uses before finalizing sizes.
How do you choose the right uniform size when measurements fall between sizes?
Round up when the measurement falls between two sizes and the work involves reaching, bending or lifting. Round down when the role is mostly desk-based and a closer fit looks more professional. Check the sleeve and body length separately, since a person may need different sizes on the top and bottom. If the difference is large, ask about tailoring options before ordering.