Quick Summary
To keep embroidered work shirts looking new, wash them inside out in cold water with a mild, non-bleach detergent, and avoid high heat. Air dry them flat or on a hanger, since hot dryers cause the puckering and fraying that damage logos.
- Read the care label and check the fabric blend before the first wash.
- Turn shirts inside out and place them in a mesh laundry bag before washing.
- Wash in cold water on the gentle cycle with a non-bleach detergent.
- Air dry flat or dry on low, removing shirts while slightly damp.
- Iron the back of the shirt on low or medium, keeping the iron off the logo.
Table of Contents
- Why Embroidered Work Shirts Lose Quality Faster Than You Expect
- Step 1: Read the Care Label and Check the Fabric Type
- Step 2: Turn Shirts Inside Out and Use a Mesh Laundry Bag
- Step 3: Wash in Cold Water with a Mild, Non-Bleach Detergent
- Step 4: Dry on Low or Air Dry to Prevent Puckering and Fraying
- Step 5: Iron Embroidered Logos Correctly Without Flattening Stitches
- Fixing Snags, Loose Threads, and Damaged Embroidery
- Booking Your Next Order of Durable Custom Work Shirts with Piercy Sports and Apparel
- Frequently Asked Questions
Why Embroidered Work Shirts Lose Quality Faster Than You Expect
Embroidered work shirts take a beating. They get washed after every shift, dried in hot machines, and tossed in piles, so the logo often fails before the shirt does. Keeping embroidered work shirts looking new comes down to a few habits that protect the thread, the fabric, and the backing behind the design.
Most damage happens in the wash and dryer, not on the job. Heat, harsh detergent, and friction break down the stitches over time. A logo that looked sharp on day one can start to pucker, fray, or pull loose within a few months if it’s treated like a regular tee.
Here’s what usually causes the problem:
- High heat weakens thread and can shrink or warp the fabric around the design.
- Bleach and harsh detergents fade colors and wear down synthetic thread.
- Friction from tumbling against zippers, buttons, and other clothes frays stitches.
- Skipped care labels lead to the wrong settings for the fabric blend.
Good news: most of this is easy to avoid. The steps below walk you through a simple routine that protects your shirts and your logos.
Step 1: Read the Care Label and Check the Fabric Type
Start with the care label, but don’t stop there. The label gives you the safe water temperature, drying method, and ironing rules for the garment as a whole. It does not tell you how the embroidery thread or the backing behind the logo will react, and those are usually the first things to fail. Read the label, then match it to the fiber content on the tag.
Work shirts generally fall into three groups, and each one needs a different routine:
- Cotton and cotton-rich blends. Cotton absorbs water and shrinks with heat, so a hot wash or a hot dryer pulls the fabric tighter around the embroidery. That shrinkage is one of the main causes of puckering around a logo. Wash cold, dry low, and expect some relaxation shrinkage over the first few washes.
- Polyester and polyester-rich blends. Polyester holds its shape and resists shrinkage, but it is heat-sensitive. An iron or dryer set for cotton can soften or glaze the synthetic thread and leave a shine on the fabric. Keep heat low and never press directly on the design.
- Performance and moisture-wicking knits. These fabrics are engineered to move moisture, and fabric softener, dryer sheets, and high heat can coat the fibers and cut down on wicking. Skip softener on these shirts entirely, and air dry when you can.
Check the label for these key details:
- Wash temperature: Usually cold or warm, never hot.
- Dryer setting: Look for “tumble dry low” or “line dry.”
- Iron symbol: A crossed-out iron means no ironing on the design.
- Fabric content: The percentage breakdown tells you which of the three groups above you’re dealing with.
Watch out: A shirt labeled “machine wash warm” may still have a polyester embroidery thread that softens at higher dryer temperatures, so treat the dryer setting as the stricter of the two limits.
One more thing to check before the first wash: the backing. Turn the shirt inside out and look at the reverse of the logo. You’ll usually see a cut-away or tear-away stabilizer, sometimes with a fusible mesh. That backing is what holds the stitches taut, and it reacts to water and heat along with the fabric. If the backing feels stiff or crinkly, plan on cooler water and lower heat to slow its breakdown.
Step 2: Turn Shirts Inside Out and Use a Mesh Laundry Bag
Turn every embroidered shirt inside out before washing. This protects the stitches from rubbing against the drum and other clothes. It also keeps the outer fabric looking fresh longer.
Place the shirts in a mesh laundry bag for extra protection. The bag keeps logos from catching on zippers, Velcro, or buttons. It also limits tangling and reduces friction during the spin cycle.
Tips for better results:
- Wash embroidered shirts with similar fabrics, not with jeans or towels.
- Close all zippers and fasten Velcro before washing.
- Avoid overloading the machine, since crowded loads cause more rubbing.
Step 3: Wash in Cold Water with a Mild, Non-Bleach Detergent
Cold water is the safest choice for embroidered work shirts. It helps colors stay bright and keeps thread from shrinking or loosening. Use the gentle or delicate cycle when your machine has one.
Pick a mild, non-bleach detergent. Bleach can dull thread colors and weaken the fabric around the design. Detergents made for colors or delicates are a good fit. Use only the amount the label recommends, since extra soap can leave residue that stiffens the fabric and makes the logo feel rough.
If a shirt has a stain, pretreat it before washing. Never scrub the embroidery directly, as this can flatten stitches or pull threads.
Step 4: Dry on Low or Air Dry to Prevent Puckering and Fraying
Heat is the biggest enemy of embroidered logos, but the damage is mechanical as much as thermal. When a wet shirt goes into a hot dryer, the fabric and the embroidery thread dry at different rates. The fabric shrinks, the thread doesn’t shrink the same way, and the backing between them stiffens as it dries. The result is the puckered, rippled ring you see around a logo that used to lie flat. Fraying comes next, because the stitches are now under tension every time the shirt moves.
For the best results, air dry your shirts flat or on a hanger. Flat drying is the safer of the two for heavy logos, because hanging a wet shirt by the shoulders puts the weight of the water into the fabric and can stretch the design area. If you hang, use a sturdy hanger and smooth the shirt into shape first.
If you must use a dryer, choose the lowest heat setting and remove shirts while they are still slightly damp to finish drying on a rack. This avoids the extra heat that builds up as clothes tumble, and it shortens the time the embroidery spends in the drum.
Other drying tips:
- Hang shirts by the shoulders, not the logo area, so the weight doesn’t stretch the design.
- Keep shirts out of direct sunlight, which can fade colors over time.
- Don’t leave wet shirts in the machine, since trapped moisture can cause odor and stiffness.
- Dry embroidered shirts separately from towels and jeans, which shed lint and add friction.
Watch out: A dryer sheet can leave a waxy film on synthetic thread and on performance fabrics, so skip it on any shirt with a logo or moisture-wicking claim.
If a shirt has already puckered, don’t assume it’s ruined. Rewash it in cold water, skip the dryer entirely, and lay it flat to dry while gently smoothing the fabric around the logo with your fingers. Some puckering relaxes out this way. If the logo still ripples after a cold wash and flat dry, the backing has likely stiffened or shifted, and that is a repair issue rather than a laundry one.
The drying method you choose has a direct effect on how long a logo stays flat and intact.
| Drying method | Best for | Key difference |
|---|---|---|
| Air dry flat | Heavy logos | Avoids stretching the design area |
| Hang by shoulders | Lightweight shirts | Keep weight off the logo area |
| Dryer on lowest heat | Shirts needing speed | Remove while slightly damp |
| Hot dryer | None of these shirts | Causes puckering and fraying |
Step 5: Iron Embroidered Logos Correctly Without Flattening Stitches
Ironing is where many logos get ruined. A hot iron pressed right on top of the embroidery can flatten the stitches and melt synthetic thread. Always iron the shirt inside out, and keep the iron away from the design itself.
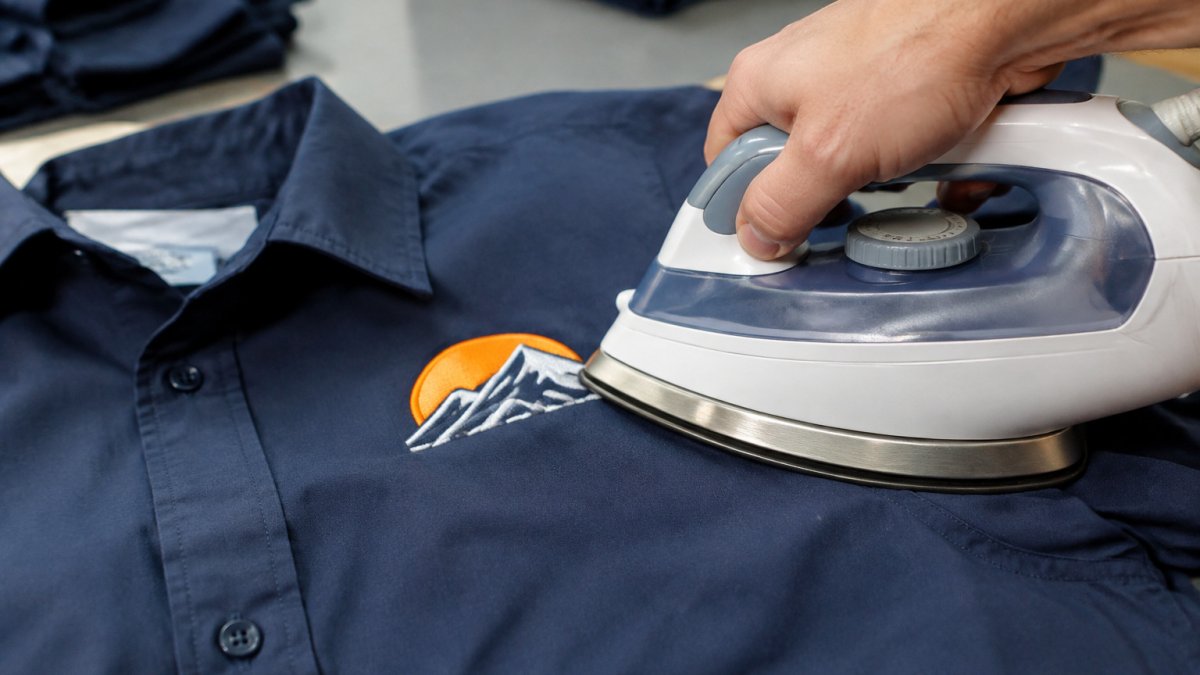
Set the iron to a low or medium temperature. Use a pressing cloth between the iron and the fabric if you’re unsure. Press gently in one direction, and lift the iron instead of sliding it across the logo.
A few more tips:
- Iron the back of the shirt when possible, so the logo stays untouched.
- Use steam sparingly, since too much moisture can leave water marks.
- Let the shirt cool before folding or stacking it.
Fixing Snags, Loose Threads, and Damaged Embroidery
Even careful owners get snags. A catch on a fence or a loose thread can ruin a clean logo fast. Act quickly, because a small pull can turn into a bigger problem with each wash.
For a loose thread, don’t yank it. Gently trim it close to the fabric with small scissors, being careful not to cut the surrounding stitches. For a snag, use a pair of tweezers to pull the loop slightly to the back of the shirt, where it’s less visible, and avoid stretching the surrounding fabric.
If a logo starts to lift or unravel, stop wearing the shirt until it’s repaired.
Watch for these warning signs:
- Stitches pulling away from the base fabric
- Puckering that doesn’t flatten after washing
- Thread color fading or bleeding onto the shirt
- Edges of the logo curling or lifting
Booking Your Next Order of Durable Custom Work Shirts with Piercy Sports and Apparel
Keeping embroidered work shirts looking new is much easier when you start with quality. At Piercy Sports and Apparel, we offer custom apparel and decoration, including premium embroidery and screen printing. Whether you need a few shirts or a full uniform order, you can contact us for help with your project.
Pricing depends on quantity, decoration, and delivery timing, so the best next step is to visit our website for current pricing or request a quote for your project.
When you’re ready to reorder, start your order with Piercy Sports and Apparel and get work shirts that look sharp from the first wash to the hundredth. Get Started
Frequently Asked Questions
How do I make embroidery more durable on work shirts?
Durability comes mostly from how the garment is cared for after purchase. Turn shirts inside out, wash in cold water on a gentle cycle with a mild, non-bleach detergent, and avoid high heat in the dryer. Stitch density and backing quality also matter, so ask your supplier how the logo was digitized and stabilized. Pretreat stains gently rather than scrubbing the thread, and store shirts folded instead of hung under heavy items to reduce pulling on the stitches.
Should embroidered shirts be washed inside out?
Yes. Washing embroidered shirts inside out reduces friction between the stitches and the rest of the load, which lowers the risk of thread fraying, snagging, and logo distortion. Place shirts in a mesh laundry bag as well for extra protection, especially when washing with zippers, hook-and-loop closures, or rough fabrics. Turning the garment inside out also protects color on the front of the logo from abrasion during the rinse and spin cycles.
Can you iron over embroidered logos on work shirts?
You can, but only with care. Iron the shirt inside out whenever possible, set the iron to the temperature listed on the fabric care label, and use a pressing cloth between the iron and the logo. Avoid pressing directly on raised thread areas, since heat and pressure can flatten the stitches and cause shine or puckering. Steam is usually safer than dry heat for embroidery, and you should never leave the iron resting on a logo for extended periods.
Is it safe to use bleach on embroidered company apparel?
Chlorine bleach should be avoided on embroidered apparel. It can fade thread colors, weaken synthetic fibers, and damage the stabilizer and backing that hold stitches in place. If a shirt needs brightening, use an oxygen-based, non-chlorine detergent or a color-safe product and check the care label first. Always test any treatment on an inside seam before applying it to the logo area.